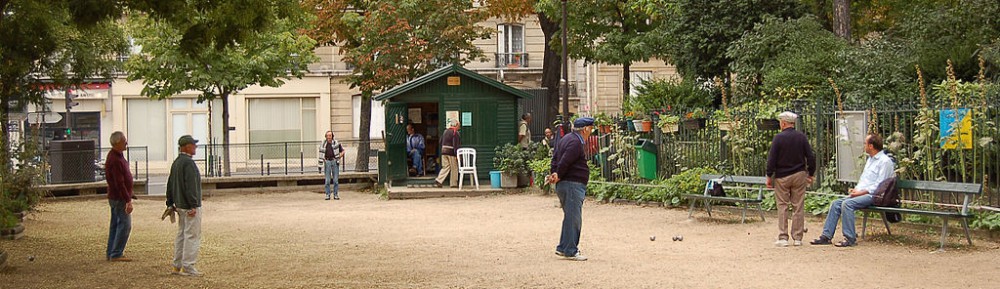
I’ve been mulling over these ideas for a while. I’m not sure they are right. Or, if they are, I’m not sure they are anything new or significant. But I decided to write this post on the grounds that some player, somewhere, might find these ideas useful.
After watching videos of world-class players on YouTube, I think I have noticed that there are two different techniques for gripping a boule.
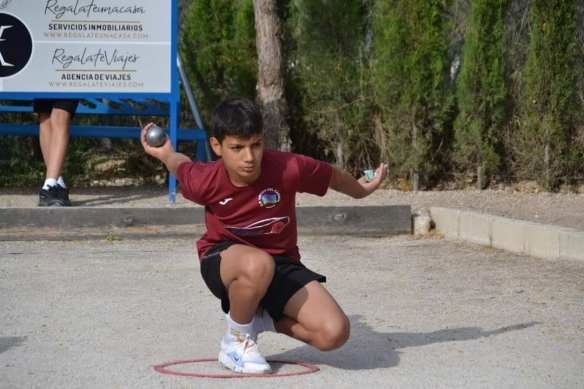
- Using the vise grip you hold the boule in the palm of your hand. You close your fingers over the boule so that you are clasping the boule between your fingers and the base of your palm, like you have it clamped in the jaws of a vise. Because you have a firm grasp on the boule, if you turn your hand over, the boule will not fall out of your hand.
- Using the cradle grip you slightly cup your fingers and cradle the boule, letting it rest on your fingers (not in the palm of your hand) rather in the way that a beach ball might come to rest in a hammock. Because the boule is merely resting on your hand, if you turn you hand over, the boule will fall out of your hand.
To illustrate the difference between the two grips, I’ve taken a few pictures. Notice that in the pictures on the left, the fingers are closed over the boule. In the pictures on the right, the fingers (beneath the boule) are almost fully extended. In the pictures on the left, the fingers are pressing the boule against the fleshy base of the palm. In the pictures on the right, the boule is close to the tips of the extended fingers, and you can see a noticeable space between the boule and the base of the palm.
Vise grip
(boule clasped in palm of hand) |
Cradle grip
(boule rests on top of fingers) |
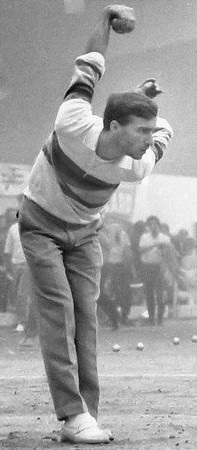
In the picture on the right (below) you see a hand posture that I’ve noticed in several “cradle-grip” players. The boule is held so far out that it seems almost to hang from the tips of the fingers. The thumb rests lightly on the boule, stabilizing it and keeping it from falling out of the fingers.
One of the most distinctive things about petanque is the way that expert players flex their wrists back and under their forearms. The standard theory is that this unique gesture helps a player to control a boule by giving it backspin.

While it may be true that the purpose of the wrist flex is to put backspin on the boule, I suspect that it serves another more important purpose for cradle-grip players. If you use a cradle grip, you are not actually holding the boule in your hand — if you turn you hand over, the boule will fall out of your hand. Therefore, in order not to drop the boule during the backswing, you must strongly flex your wrist, hand, and fingers back under your forearm. Together, they form the enclosing cradle that allows gravity to keep the boule in the hand during the backswing. That is why a vise-grip player may or may not flex his wrist, but a cradle-grip player will ALWAYS flex his wrist in this dramatic way. For a cradle-grip player, a consistent and serious wrist flex is a necessary component of effective throwing form.
GRIPS OF THE STARS!
If you watch world-class players in YouTube videos, you will see that some of them use a vise grip while others use a cradle grip. It doesn’t appear that either of the techniques is inherently superior to the other. Some top players use one grip, and others use the other.
I first noticed the cradle grip in videos of Philippe Quintais pointing.

Philippe Quintais

Philippe Quintais

Philippe Quintais
If you go looking looking for the cradle grip in YouTube videos, you quickly learn to identify a few distinctive hand gestures. As I’ve said, if you carefully watch a cradle-grip player preparing to throw, he doesn’t appear to be holding the boule at all — the boule seems almost to be hanging from his fingers. Once I identified the cradle grip, I went looking for other players who might be using it. I found several. You’ll probably recognize some of them. Marco Foyot and Christian Fazzino seem quite clearly to be cradle-grip players. (Mouse-over a picture for the name of the player. Click on a picture to go into slide-show mode and see slightly larger versions of the pictures.)

Christian Fazzino

Christian Fazzino

Marco Foyot

Marco Foyot

Marco Foyot

Bruno Boursicaud

Unidentified player

A Moroccan player

A Moroccan player

A Moroccan player
During my search for cradle-grip players, I found many players whose grip-type I was unable to diagnose, and I also found vise-grip players. Here are just a few players that I think are probably vise-grip players.

Diego Rizzi

A Madagascar player

Damien Hureaux

Damien Hureaux

A Spanish player

A Spanish player
Grip type and boule size
I suspect that boule size is important to a different degree in the two types of grip.
For a vise-grip player, boule size is important. A vise-grip player does NOT want a boule that is too big. If the boule is so big that it is hard to wrap your fingers around it, it will be difficult to grip tightly. A big boule will tend to slip out of your grip. You will need to grip the boule harder, and this will produce tired and aching muscles in your forearm. So it is important for a vise-grip player to use a boule that is small enough to be gripped easily.
For a cradle-grip player, boule size is less important, perhaps even unimportant. The cradle-grip player is holding the boule very loosely, just barely cradling it in his fingers. For him (or her) there isn’t much difference between cradling a medium-size boule and a large one. This means that a cradle-grip player can comfortably play with a much larger boule.
This means (perhaps) that learning to throw with a cradle grip might be a useful strategy for women players. Actually, it might be useful for players (of either sex) with small hands. Or even players with large hands, if they play a lot and are tired of having aching forearm muscles.
Updated a few days later (2015-03-15)

By chance I just ran across
a post from 2007 on the
Petanque710 forum. Someone noted that Philippe Suchaud and Christian Fazzino play with small boules— 71mm. Another commenter ventured the opinion that
la facon de jouer avec des petites boules est très différente qu’avec des plus grosses car on joue plus avec le bout des doigts car elles ne tiennent pas toute la main (regarder fazzino jouer , il les tient du bout des doigts). “The way one plays with small boules is very different than with larger ones because one plays more with the fingertips because [small boules] do not take up the whole hand (watch Fazzino play, he holds them by the fingertips).”
So I have one concurring opinion that Fazzino uses a cradle grip. I doubt, though, that Fazzino uses a cradle grip because he uses a small boule. As you can see from the pictures above, a number of top players (notably Marco Foyot) use a cradle grip and a large boule.


 … or the no less remarkable Pascal Milei—
 Still, you don’t need to be that extreme. For most players, getting your throwing arm back until it is horizontal is enough to do the job.
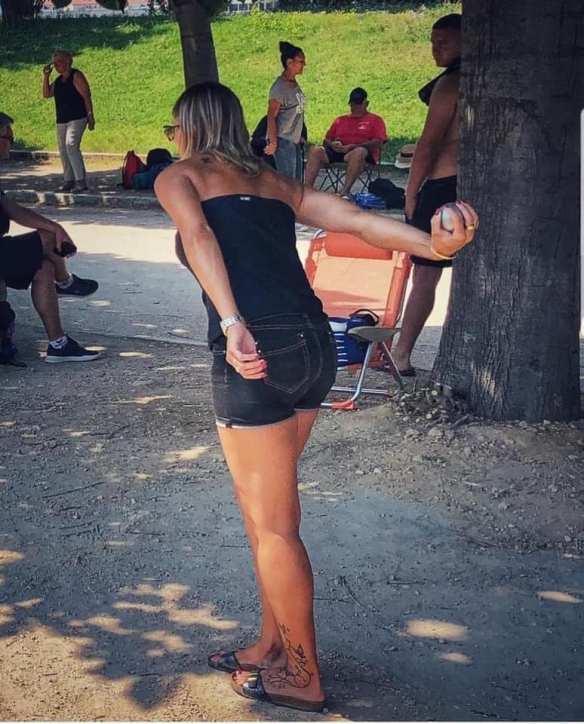

 You don’t always want to shoot or lob, so you don’t always need a big backswing. But sometimes you do want to shoot or lob, and that’s when you must have a big backswing in your tool bag.


 One of my favorite posts on this topic is Artem Zuev’s post on


