Decathlon, a French sporting goods chain which briefly was a source of inexpensive high-quality petanque gear and competition boules in the USA, has shut down its operations in the USA. On March 6, 2022, it closed all of its retail locations in the USA (basically, its two stores in the San Francisco area). Its website says that in the future, it plans to focus on other channels to distribute Decathlon products, including the Decathlon website (decathlon.com) and a number of retail partners.
Unfortunately, although Decathlon.com is still up and running, NO petanque products are available there. Petanque equipment is still available from Decathlon Canada . The site navigation is a bit confusing. The page for the popular Geologic Alpha boules is HERE.
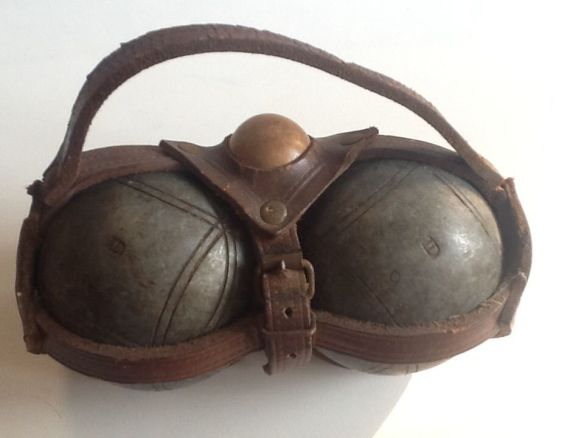
Most (all?) leisure sets come as a set of three boules. On eBay and antique sites I see balls in a two-ball set, with leather carrier. Why two? Is it perhaps that most people once played triples?
The answer is YES, Ray, you hit the nail on the head.
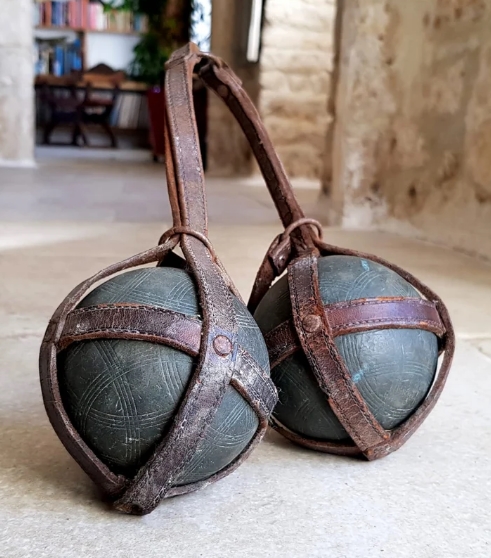
In The Beginning, petanque was a triples game. That is, it was played by two teams of three players, with each player playing with two boules. That’s why on places like eBay and Etsy, you often see an offer of an old set of two boules in a traditional leather-strap carrying case.
In 1959, the newly-created FIPJP issued its first set of rules, and this was the first time that an official set of rules mentioned a doubles version of the game. In the 1962 version of the rules, we see the now-familiar listing of three officially-accepted forms of the game— triples, doubles, and singles (tête-à-tête).
Doubles quickly became popular, and in response boules manufacturers began selling boules in sets of three. For a long time they continued also to sell boules in sets of two, but the market for 2-boule sets steadily declined until Obut finally stopped selling sets of 2 competition boules in 2012.
Many of the sets of two boules that you see on eBay and Etsy are old, some of them dating as far back as the 1930s. But Obut continued selling two-boule sets right up to 2012, so some of the sets may actually be quite new. The DOG leisure boules that Obut sold after World War II, for instance, were sold in pairs.
There seems to have been two basic designs for the leather carrier. One very popular design used long leather straps that could slide in and out through metal rings.
The other design was more compact, with a belt and a belt buckle between the boules.
Sometimes the carrier had a little built-in pocket for carrying a jack.
In July 2010 the international media went into a frenzy after Karl Lagerfeld threw a party in St. Tropez for The Beautiful People. He gave them free customized Chanel boules. Pretty spiffy!
Petanque players begin life by going through a complete novice stage in which they learn the basics of the game, the basics of the rules, the basics of how to throw a boule, the basics of strategy, etc. etc. Some remain at that stage forever (which I totally approve; relaxing and puttering around with your friends is one of life’s great joys). But others move on to a “new player” stage, in which they actively start to search for information about how to get better at the game.
For those players, for the last decade the only decent English-language book on petanque has been Byron Putman’s 2011 book “Pétanque: The Greatest Game You Never Heard Of”, which is quite good as a general introduction to the game and is still very much worth reading.
But now (as of April 20, 2022) we have something that more precisely meets the needs of new players. It is Harwell Thrasher’s “Winning Petanque”. Thrasher’s new book is aimed at new players, and it does an excellent job of filling their needs for information about everything from how to throw a boule to game strategy and techniques. The book is clear, correct, easy to read, and comprehensive. Friends who have read the book, and the reviews on Amazon.com, are all extremely positive.
If you wish, you can go to Amazon.com and “look inside” to see the table of contents. But the bottom line is that without question, “Winning Petanque” is absolutely the best English-language book available to meet the needs of a petanque player who wants genuinely useful information about how to become a better player.
Thrasher, I believe, learned the game and still plays with the Atlanta Petanque League. And his writing style reflects what might be considered a “no nonsense” American attitude toward getting better at the game. The prose is simple, clear, un-ornamented, and straight-to-the point. One amazon reviewer wrote that the book “is a “how to” engineering manual, without rhetorical flourishes or fancy jargon. Every line contains useful information.”
The book does not deal with anything outside of ways to play better. There are no French cultural or historic references, no use of French petanque terminology, and no discussions of player psychology, concentration, or mental strength and focus. If you want that, you might look at Sam Porter’s inexpensive Kindle book “TWO BALLS AND HALF A BRAIN: A Mindful approach to Petanque playing”.
A short history of petanque (12 pages) | docx | pdf |
by Stephen Ferg (revised 2022-06-06)
If you are interested in the history of petanque, I highly recommend Jac Verheul’s Facebook group La Fabuleuse Histoire de la Pétanque – Les premières années. It is the source of several of the photographs of early petanque in this paper.
Some of our players have serious back issues. We began to help them by making our own “magnetic” jacks that can be lifted with a magnetic boule lifter. Our players liked the magnetic jacks, and asked if we could make a magnetic throwing circle, too.
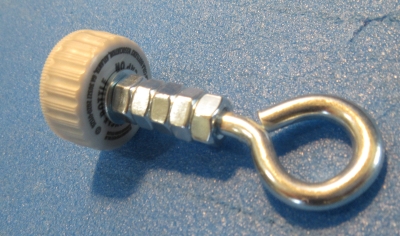
For petanque players with back issues, a magnetic boule lifter can be a life-saver. You can buy one on the web, or you can make your own. This design for a home-made lifter is actually better than some of the ones you see for sale on the web. MATERIALS
All of the materials should be available at your local hardware store. When I did this project in April 2022 in Tucson, Arizona, the total cost of materials was between $15 and $20. You will need—
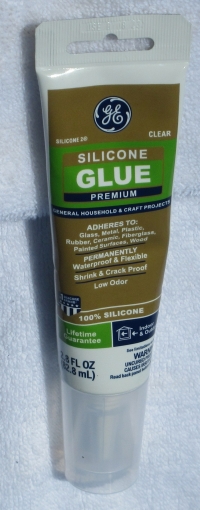
Silicon glue. About $8 at my local hardware store.
One eye bolt with a diameter of 1/4″ and a length of about 2.5 inches. Enough nuts (probably around 6 or 7) to fill all the threads of the eye bolt. Two small washers with a 1/4″ hole. And a plastic bottle cap from a bottle of soda.
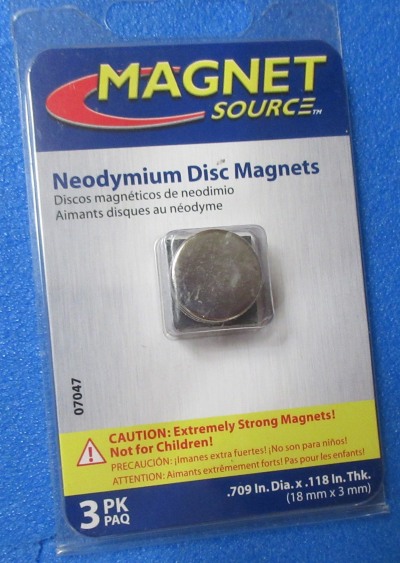
One nickle-sized neodymium disc magnet (18mm in diameter and 3mm thick). A 3-pack cost me $6.60 at my local hardware store.
ASSEMBLING THE LIFTER
Drill a 1/4″ hole in the center of the bottle cap, so that it can be threaded onto the eye bolt.
Tightly screw enough nuts onto the bolt almost to fill its entire length.
Add one washer, then the bottle cap, then the other washer.
Finally, screw a nut tightly on to the end of the eye bolt so that it holds everything together.
Note that the end of the bolt doesn’t protrude out past the nut.
At this point you can place the magnet on the nut and see where it will be located when the project is complete.
Note that the magnet is positioned slightly below the edges of the bottle cap. That’s good. The magnet will be well protected.
Squirt a thin layer of silicon glue onto the nut.
Fill the area around the nut with more silicon glue, so the nut looks like an island in a sea of silicon.
Position the magnet on top of the nut and push it down firmly, so that it is glued to the nut.
The final step is to fill the area around the magnet with more silicon glue, right up to the edges of the bottle cap. The goal here is to create a rubbery silicon buffer around the magnet. The silicon buffer will protect the edges of the magnet, and the edges of the bottle cap, in turn, will protect the silicon buffer.
If there is any glue on the face of the magnet, wipe it off with a paper towel so that the face of the magnet is clean. Gently smooth out any bumps or irregularities in the silicon glue around the magnet.
Set the lifter aside to give the silicon glue time to cure. Since we’ve slathered on the glue in great dollops rather than using it as a thin layer of adhesive, allow extra time for it to cure. When it has cured, you will have a working boule-lifter.
Attaching a cord
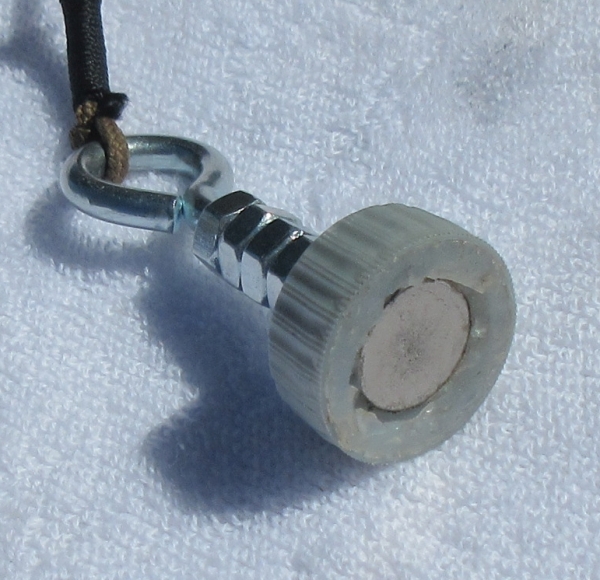
When you attach a cord and a ring, your lifter will be ready to use. Note that I say “cord”, not “string”. Strings get tangled easily because they are thin and flexible. Something thicker and stiffer— a cord— won’t tangle so easily. For another boule lifter I used a light cotton cord (see picture below). In this project I used a heavy boot lace.
Select a metal ring that can be grabbed by the magnet. (That way you can wear the lifter like a necklace when you’re not using it.) A split metal key ring works well enough, but I prefer a nice “welded ring” (like the one in this picture) which I got at my local hardware store for $1.60.
The boule lifter is now ready for use. There is a photo of the finished product at the top of this page.
This is actually our second design for a magnetic boule lifter. Our first version used galvanized steel washers and epoxy glue (rather than a plastic bottle cap and silicon glue) to support and protect the magnet. It worked well, but didn’t last very long. The epoxy had difficulty sticking to the smooth flat surface of the steel washers, and it was so brittle that it cracked and broke away after about three months of use. I think that this design will solve those problems. Over the next few months I will use it regularly and report on what I find. [2022-04-02]
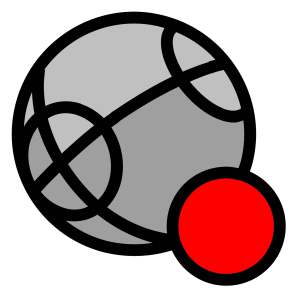
In English we’d say that the boule is kissing the jack. What would a French petanque player say?
The French expression is faire un biberon (to make a baby-bottle) or faire un têtard (to make a tadpole). The French seems to suggest that the boule isn’t merely close to the jack, or touching it. The boule is stuck to the jack. Like a baby sucking on a baby-bottle?
Anyway, if you have a question about French petanque terminology, here is one online resource.
Can I use this set of boules in an FIPJP-sanctioned competition?
How can I tell whether this is a leisure boule or a competition boule?
When you have such a question, look at two things.
Look at the packaging
If you just bought a new set of boules, or are thinking about buying a new set of boules, look at the packaging. The packaging of a set of competition boules will display the FIPJP’s V-shaped, rainbow-colored logo and the words boules homologuées (“certified boules”) or some variation on those words— boules de compétition homologuées— homologué en compétition par la FIPJP— agréés par la FIPJP en compétition.
If you don’t see those words or the FIPJP logo, the boules are not competition boules.
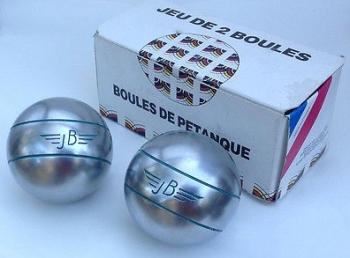
Note that manufacturers often sell both competition boules and leisure boules, so the name of a reputable French manufacturer does not mean that the boules are competition boules. If the packaging does not display the FIPJP logo and the “certified” label, the boules are not competition boules. These classic JB boules look great… but they are not competition boules.
If you’ve bought a set of used boules on eBay, be alert. Look at the boules themselves and don’t trust the packaging. I’ve seen leisure boules offered on eBay in a cardboard box that originally contained competition boules.
Look at the boules
How can you tell— by looking at a boule— whether or not it is a competition boule?
First, look for indicators that it is a leisure boule.
If the boule is marked with the phrase “Made in France”, it is a leisure boule.
A very bright, shiny chrome finish, along with rounded (rather than crisply-cut) edges on grooves, is the hallmark of an inexpensive Chinese-made leisure boule.
Other hallmarks of inexpensive Chinese-made leisure boules include— packaged in a soft-sided bag (containing 3, 6, or 8 boules) that includes a small jack and a measuring string with two plastic ends. Typically the bag is marked with a single word— “petanque” or “boules” or “bocce”.
If that doesn’t answer the question, look for indicators that it is a competition boule. Competition boules are required to display three pieces of information.{1}
the manufacturer’s name (or logo) and the name (or logo) of the model of boule.
the weight (poids) of the boule in grams. This is a number between 650 and 800.
a set identifier. This is a combination of letters and/or numbers that uniquely identifies a particular set of boules. All of the boules in the set will have the same ID.{2}
A boule that is missing any any of these required marking is not a competition boule and may not be used in an FIPJP-sanctioned competition.{3}{4}
Note that a competition boule may contain other markings as well. La Franc stamps their boules with the size (diamèter) of the boule. MS Petanque boasts that the complete markings on its boules give you all of the information about the boule, including the year it was manufactured (l’année de fabrication). And of course a previously-used set of boules may be stamped with the name or initials of its original owner.
The bottom line
The bottom line is that the ultimate test for whether or not a boule can be used in an FIPJP-sanctioned competition is the presence or absence of all three of the pieces of information that are required to be stamped onto all FIPJP-certified boules.
{2} Some boule manufacturers occasionally sell— at steeply discounted prices— sets of competition boules that have mis-matched IDs. Note that such boules are allowed in competitions. FIPJP rules require that all of a player’s individual boules must be certified, but not that they must all come from the same set.
{3} Note that not every boule without these marking is a leisure boule. Very rarely, a boule without the required markings is a good-quality French boule manufactured before 1974, when the FFPJP first began requiring markings on competition boules. Still, without the required markings, such older boules may not be used in FIPJP-sanctioned competitions.
{4} Note that “open” competitions (such as the Amelia Island Petanque Open, in Florida) often have no requirements about the kind of boules the participants use.
Many players learn to play in clubs where casual play is the norm. They may not have a role model to show them what a big backswing looks like, and probably nobody has ever coached them about their form. That’s unfortunate, because you need a good, healthy backswing to get the power you need to shoot au fer or to throw a high lob. In addition, a big backswing can improve your left-right accuracy.
It’s not difficult to acquire a good backswing. You can see players and their backswings in photographs and Youtube videos, and once you’ve seen a big backswing, it’s relatively easy to do it yourself. (As Aristotle said, we learn by imitation.) The trick is to practice doing it regularly and consciously. With practice you will acquire the muscle-memory and shoulder flexibility that you need, and soon you will be doing it automatically, smoothly, and effortlessly. (It is actually easier to throw with a big backswing. You’re letting gravity help you do the work, and you have a longer distance across which to accelerate the boule gradually.)
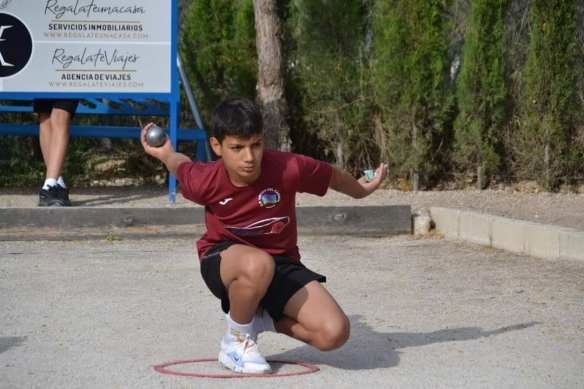
So let’s look at some young players with a good backswing.
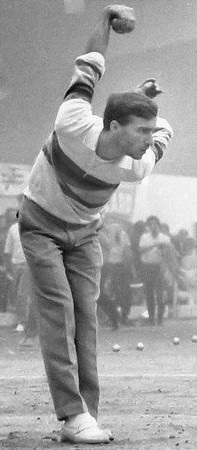
These young men have beautiful— and rather extreme— backswings… they actually bend forward in an effort to get a larger backswing. This kind of exaggerated backswing— torso leaning forward, both hands far back and very high— is what some of the world’s great shooters use to power their shooting. Consider the remarkable Didier Choupay— … or the no less remarkable Pascal Milei— Still, you don’t need to be that extreme. For most players, getting your throwing arm back until it is horizontal is enough to do the job.
One of the world’s great shooters, Philippe Suchaud.
Photo envoyé par Pascal Delfosse.
A good backswing will give you enough power to shoot au fer. It will also give you enough power to throw a high lob, even when squat-pointing.
Here is a great photo of Celia Crittenden showing how it’s done. You don’t always want to shoot or lob, so you don’t always need a big backswing. But sometimes you do want to shoot or lob, and that’s when you must have a big backswing in your tool bag.
The concept of a null point is an important one, yet it is virtually unknow to English-speaking petanque players. So— What is a null point?
At any time during a mène (end, round) the game must be in one of two states.
One of the teams has the point.
Neither of the teams has the point.
In French, when one of the teams has the point, we say— “team X has the point” (l’équipe X a le point).
If neither team has the point, we say— “there is a null point” (il y a un point nul) or “the point is null” (le point est nul).
It is as simple as that. When neither team has the point, the point is null.
There are two situations in which the point is null.
The best boules of each team are equidistant from the jack, so that neither boule is closer than the other.
There are no boules on the terrain.
There are special rules for how to continue when the point is null— see our post on Which team throws next.
So, you ask— Why have I never heard the expression “null point”?
The answer is— Because the English version of the FIPJP rules mistranslates the expression “null point”. The last sentence of Article 16 of the French rules is this:
Si aucune boule ne se trouve plus en terrain autorisé à la suite d’un tir ou d’un appoint, il est fait application des dispositions de l’article 29 relatives au point nul.
If after shooting or pointing no boules are left on the designated playing area, the arrangements concerning a dead end as defined in article 29 apply.
Since this is the only place where the expression point nul occurs in the FIPJP rules, mistranslating it in this one place almost guarantees that English-speaking players will never read or hear the expression. An equidistant-boules situation. Neither team has the closest boule— the point is null. Note that the jack is not dead.
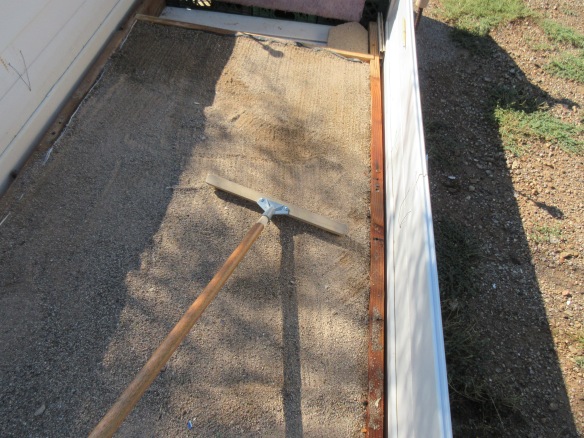
My fifth design for a shooting pit is essentially a sandbox covered by carpet. The idea works so well that I think it may be The Ultimate Shooting Pit Design.
The basic idea — a sandbox
When you’re practicing shooting with a shooting pit, boules sometimes bounce high enough to fly out of the pit. The usual solution for this problem is to enclose the pit with nets or high sideboards, but there’s another solution— make the pit out of sand, which will dampen the bounce of a bouncing boule. Lay a piece of carpet over the sand, to enable boules to roll away from their donnée and into a boule collecting area where they can easily be gathered up.
When I began my project, I had a general idea of what I was going to build (see the diagram, below) but construction was essentially a series of improvisations. [Click to view larger image.]
Making the sandbox frame
At my local lumber yard I purchased three 8-foot-long 2×6 boards. Out of one board I cut two 41-inch lengths to be used as the ends of the sandbox. I used the other two boards for the long sides of the sandbox. I used four big screws to bolt the boards together to form a rectangular frame.
Adding the sand
I laid a 4’x8′ sheet of heavy-duty plastic (Plas-Tek) on the ground to create a more-or-less flat surface, and then I laid the frame down on the Plas-Tek. Around the inside of the frame I laid down heavy-duty plastic garbage bags. The bags formed a patch over the joint between the wooden frame and the Plas-Tek foundation, to keep sand from leaking out from under the frame.
With the frame in place, I filled it with sand so that the top of the sand was flush with the top of the boards.
I used some surplus plastic fence boards to build sideboards along the sides of the sandbox, about an inch outside of the wooden frame. The distance between the sideboards, across the pit, was about 45 inches. It is important that this distance be less than 48″ (four feet)— I’ll explain why when I discuss the rain cover for the pit.
Leveling the sand
Installing the carpet
The finishing touch to the basic design was to lay a piece of scrap carpet over the sand.
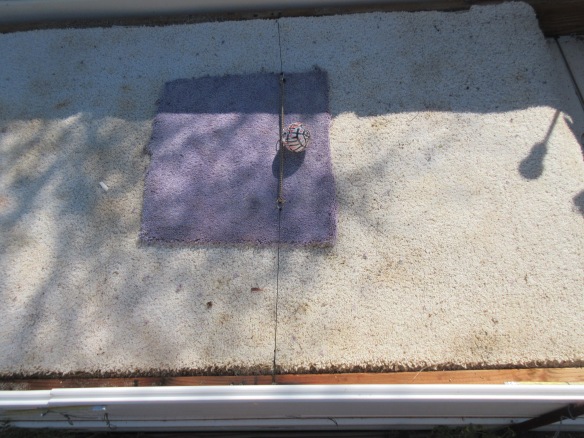
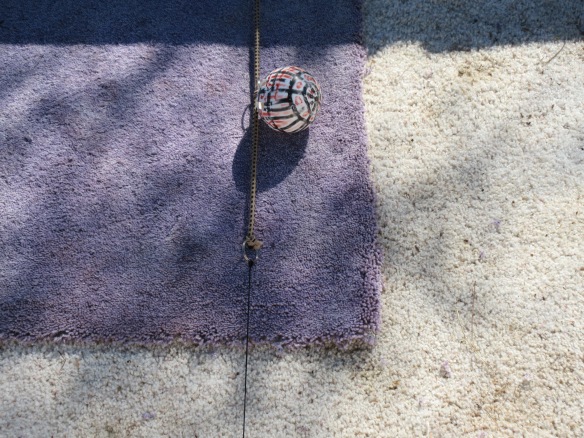
Installing the target ball
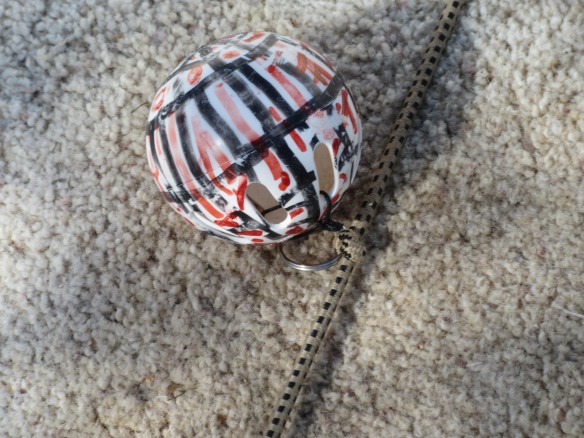
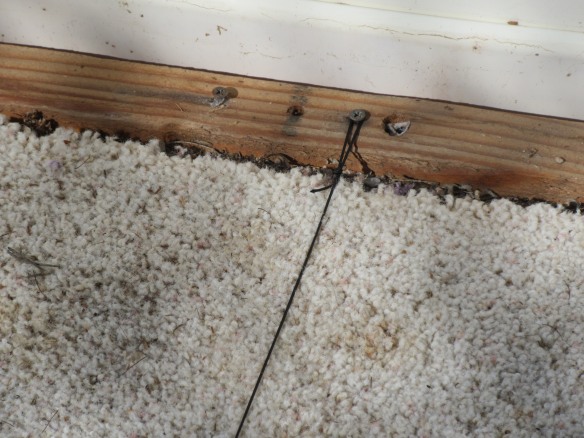
The target ball is a wiffle ball on a light elastic cord stretched across the pit. (See shooting practice with a wiffle ball.)
Under the target, I placed a pad made of a darker-colored carpet scrap. It helps make the target more visible, and provides a little extra protection for the underlying sand, which receives a regular pounding.
I used magic markers to make the wiffle ball more visible in low-light conditions.
If I want to place the rain cover over the sandbox, or if I want to remove the carpet to re-level the sand, the wiffle ball’s cord can be unhooked and removed quickly and easily.
Installing the backstop
To make the backstop, I bought some heavy-duty UV-resistant sandbags on amazon.com, filled them with sand, and piled them up to create a low wall. The wall acted as a backstop and also enclosed a collecting area for boules at the end of the shooting pit. The sandbags did an excellent job of stopping boules, but it took a lot of sandbags to make a reasonably high backstop. The sandbags were heavy and difficult to work with. And the pile was irregular and unstable. I pulled it down and went looking for something better.
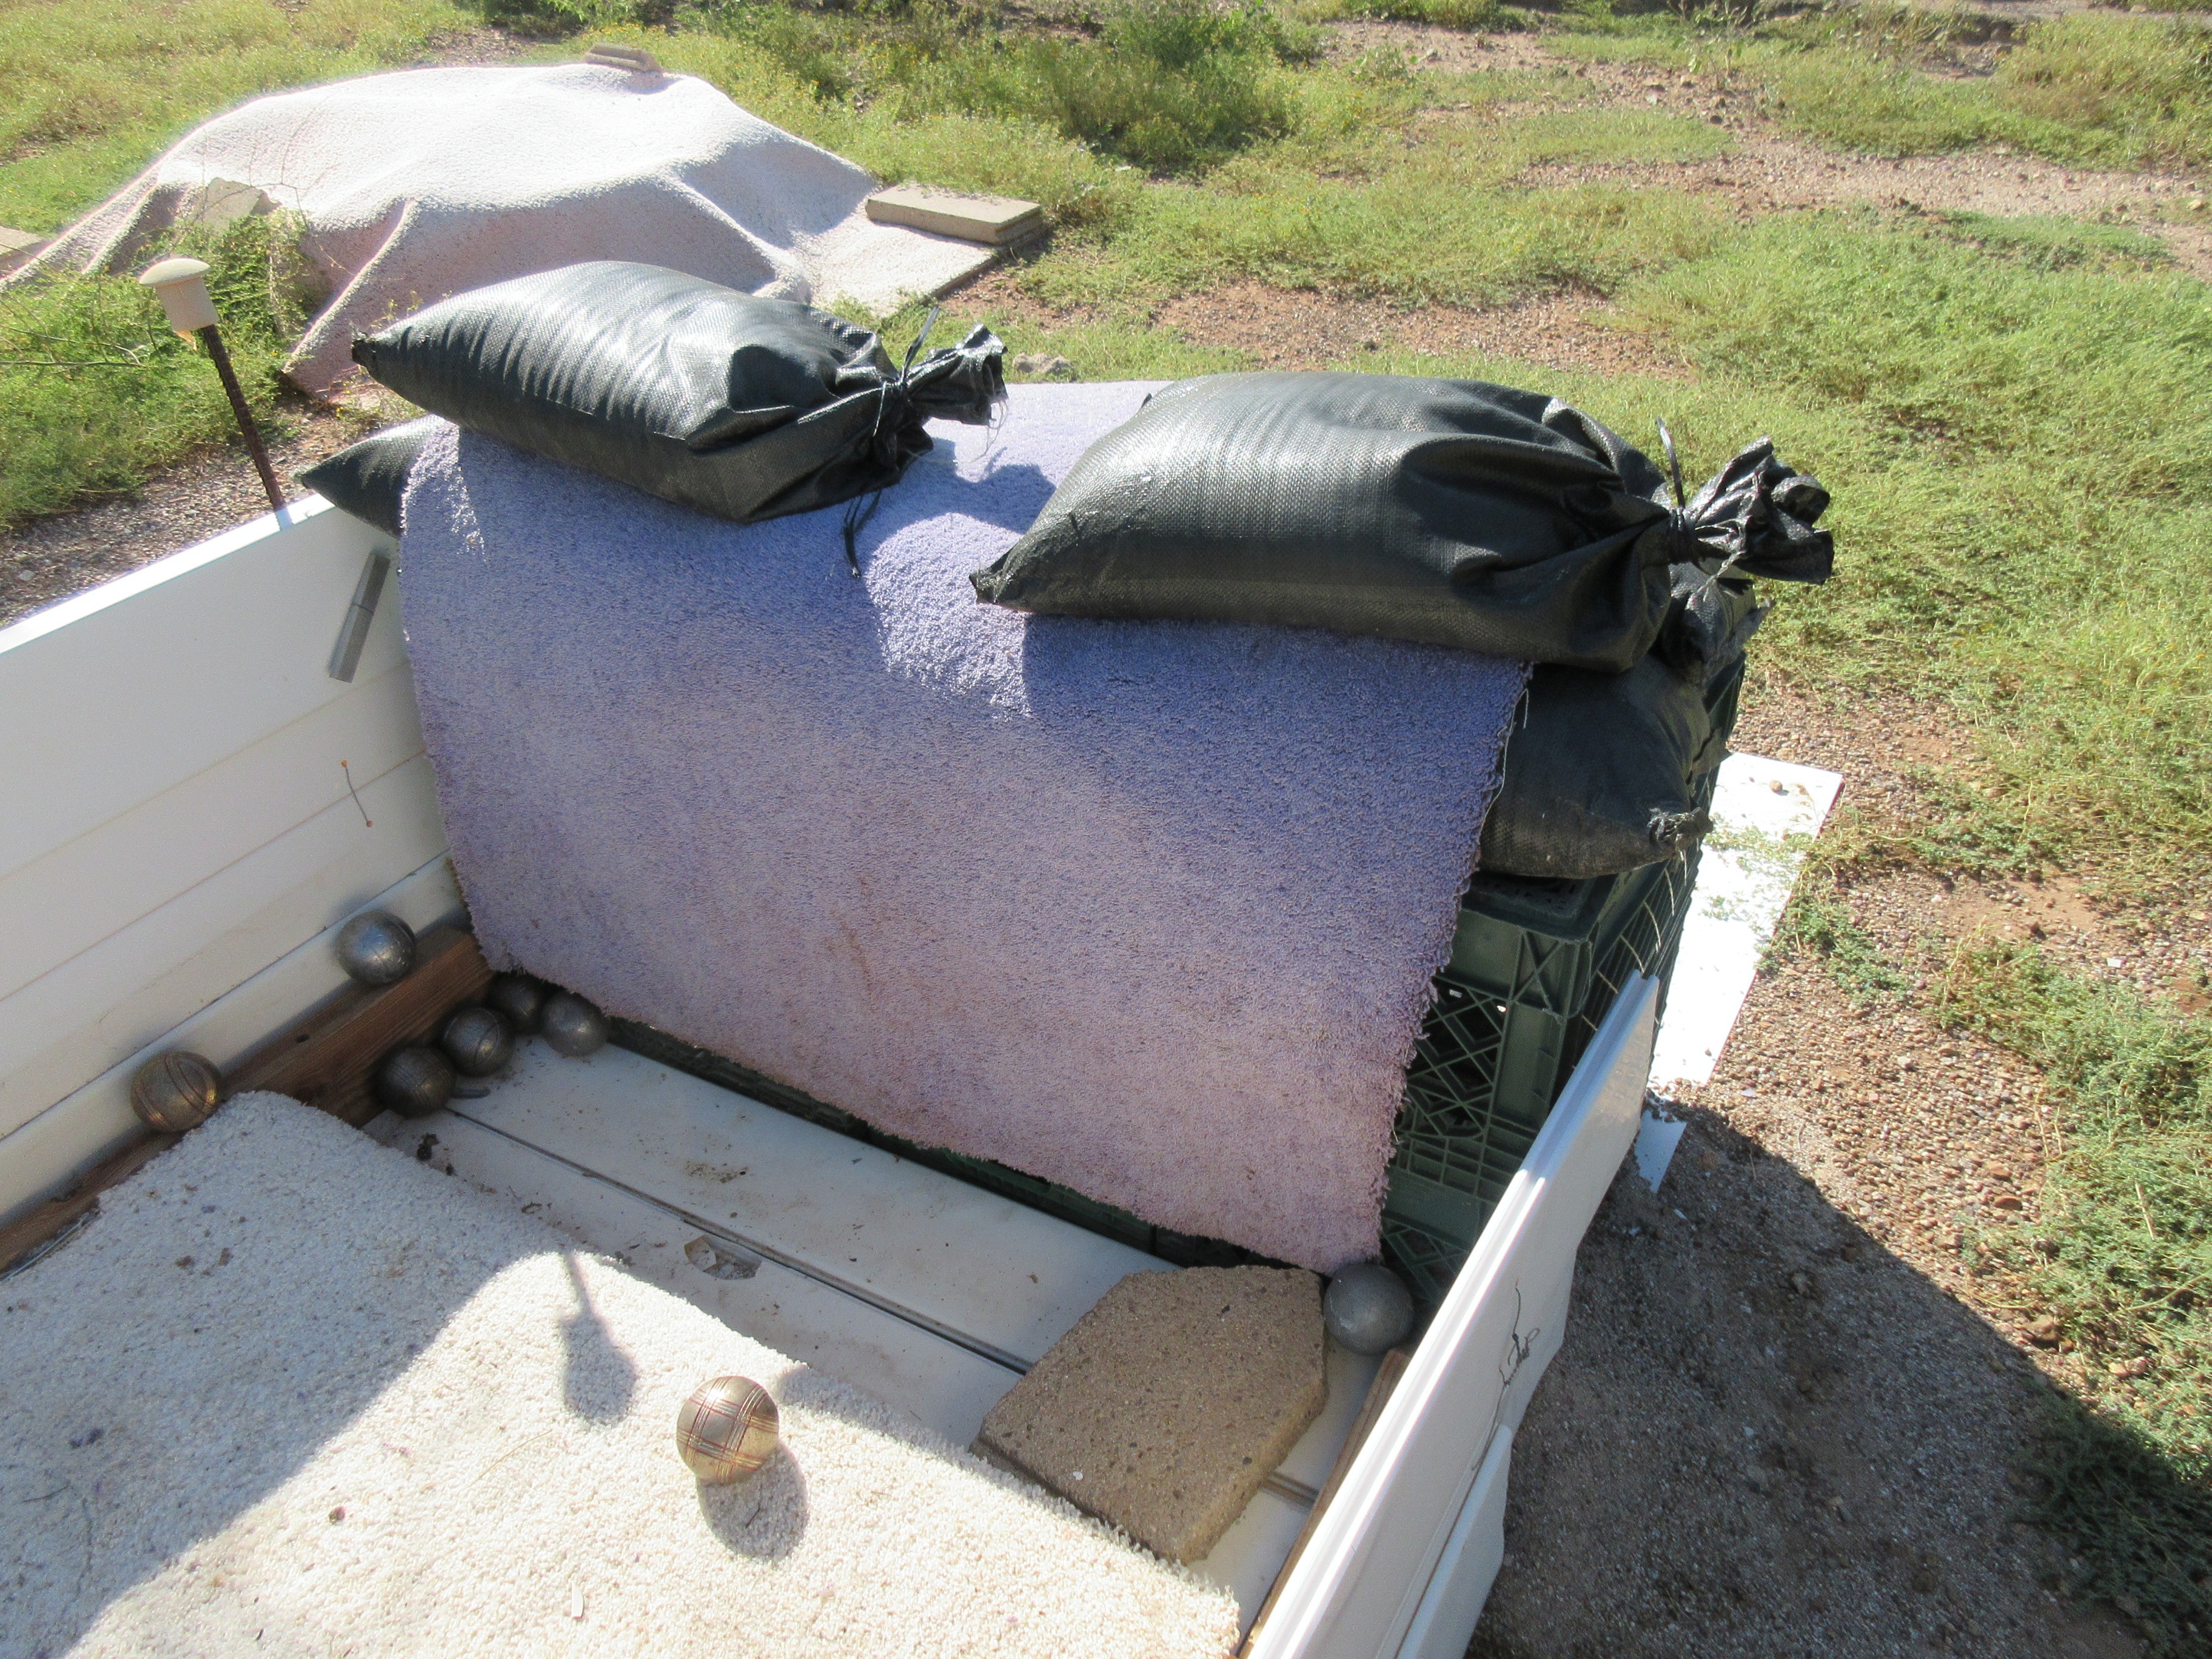
I found some heavy-duty milk crates at a local thrift shop, and I used them to make a backstop. I liked working with the crates— compared to the sandbags they were very light and much easier to work with.
Structurally the milk crates worked very well, but their sides were so elastic that boules would hit them and bounce back onto the sandbox rather than dropping into the boule-collection area. As an experiment, I hung a curtain of scrap carpeting in front of the crates. This worked very well. When a fast-moving boule hits the hanging carpet, the weight of the carpet absorbs its momentum and the boule drops down into the boule-collecting area. A couple of sandbags on top of the crates secures the carpet in place and makes the whole structure heavy and immovable.
Installing the boule collector board
I installed a sloping board in the boule-collecting area. The slope of the board makes boules roll to one side of the the boule-collecting area, which makes it easier to gather up the boules. Occasionally during lobbing practice a wild high lob will drop straight down into the boule collector, so I replaced my first board of white plastic fencing material with a sturdy piece of 2×12 lumber.
Installing the rain cover
I used another 4’x8′ sheet of Plas-Tek as a rain cover. It is surprisingly light. It can quickly and easily be placed over the sandbox (and later removed) in case of rain. Because the distance between the sideboards is less than four feet, when you lay the four-foot-wide Plas-Tek sheet across the pit, it naturally curls up on one side. This creates a slope that causes rain to run off the Plas-Tek sheet and into the gap between the sandbox frame and the sideboard.
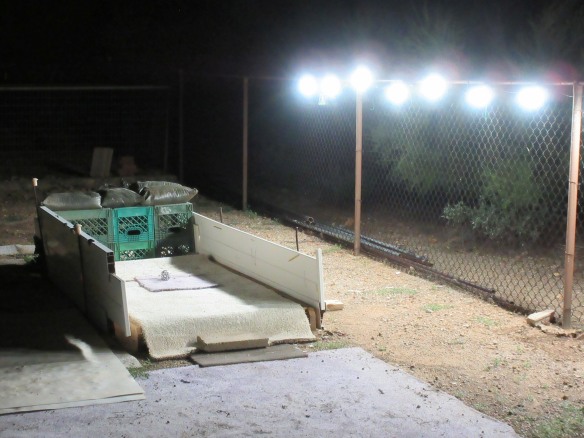
Installing night lights
This was an afterthought. In Tucson’s desert climate, the best time to practice is before and after sundown. By then the heat of the day is dying down, there is a light breeze, and it is delightful to be outdoors. I had installed the shooting pit near a fence, and I realized that I could hang lights from the fence and continue practicing even after it started to get dark. So I did that, and it worked great. I wish now that I had installed the pit a little closer to the fence, and if I ever build another shooting pit I will definitely make lighting a part of the project.
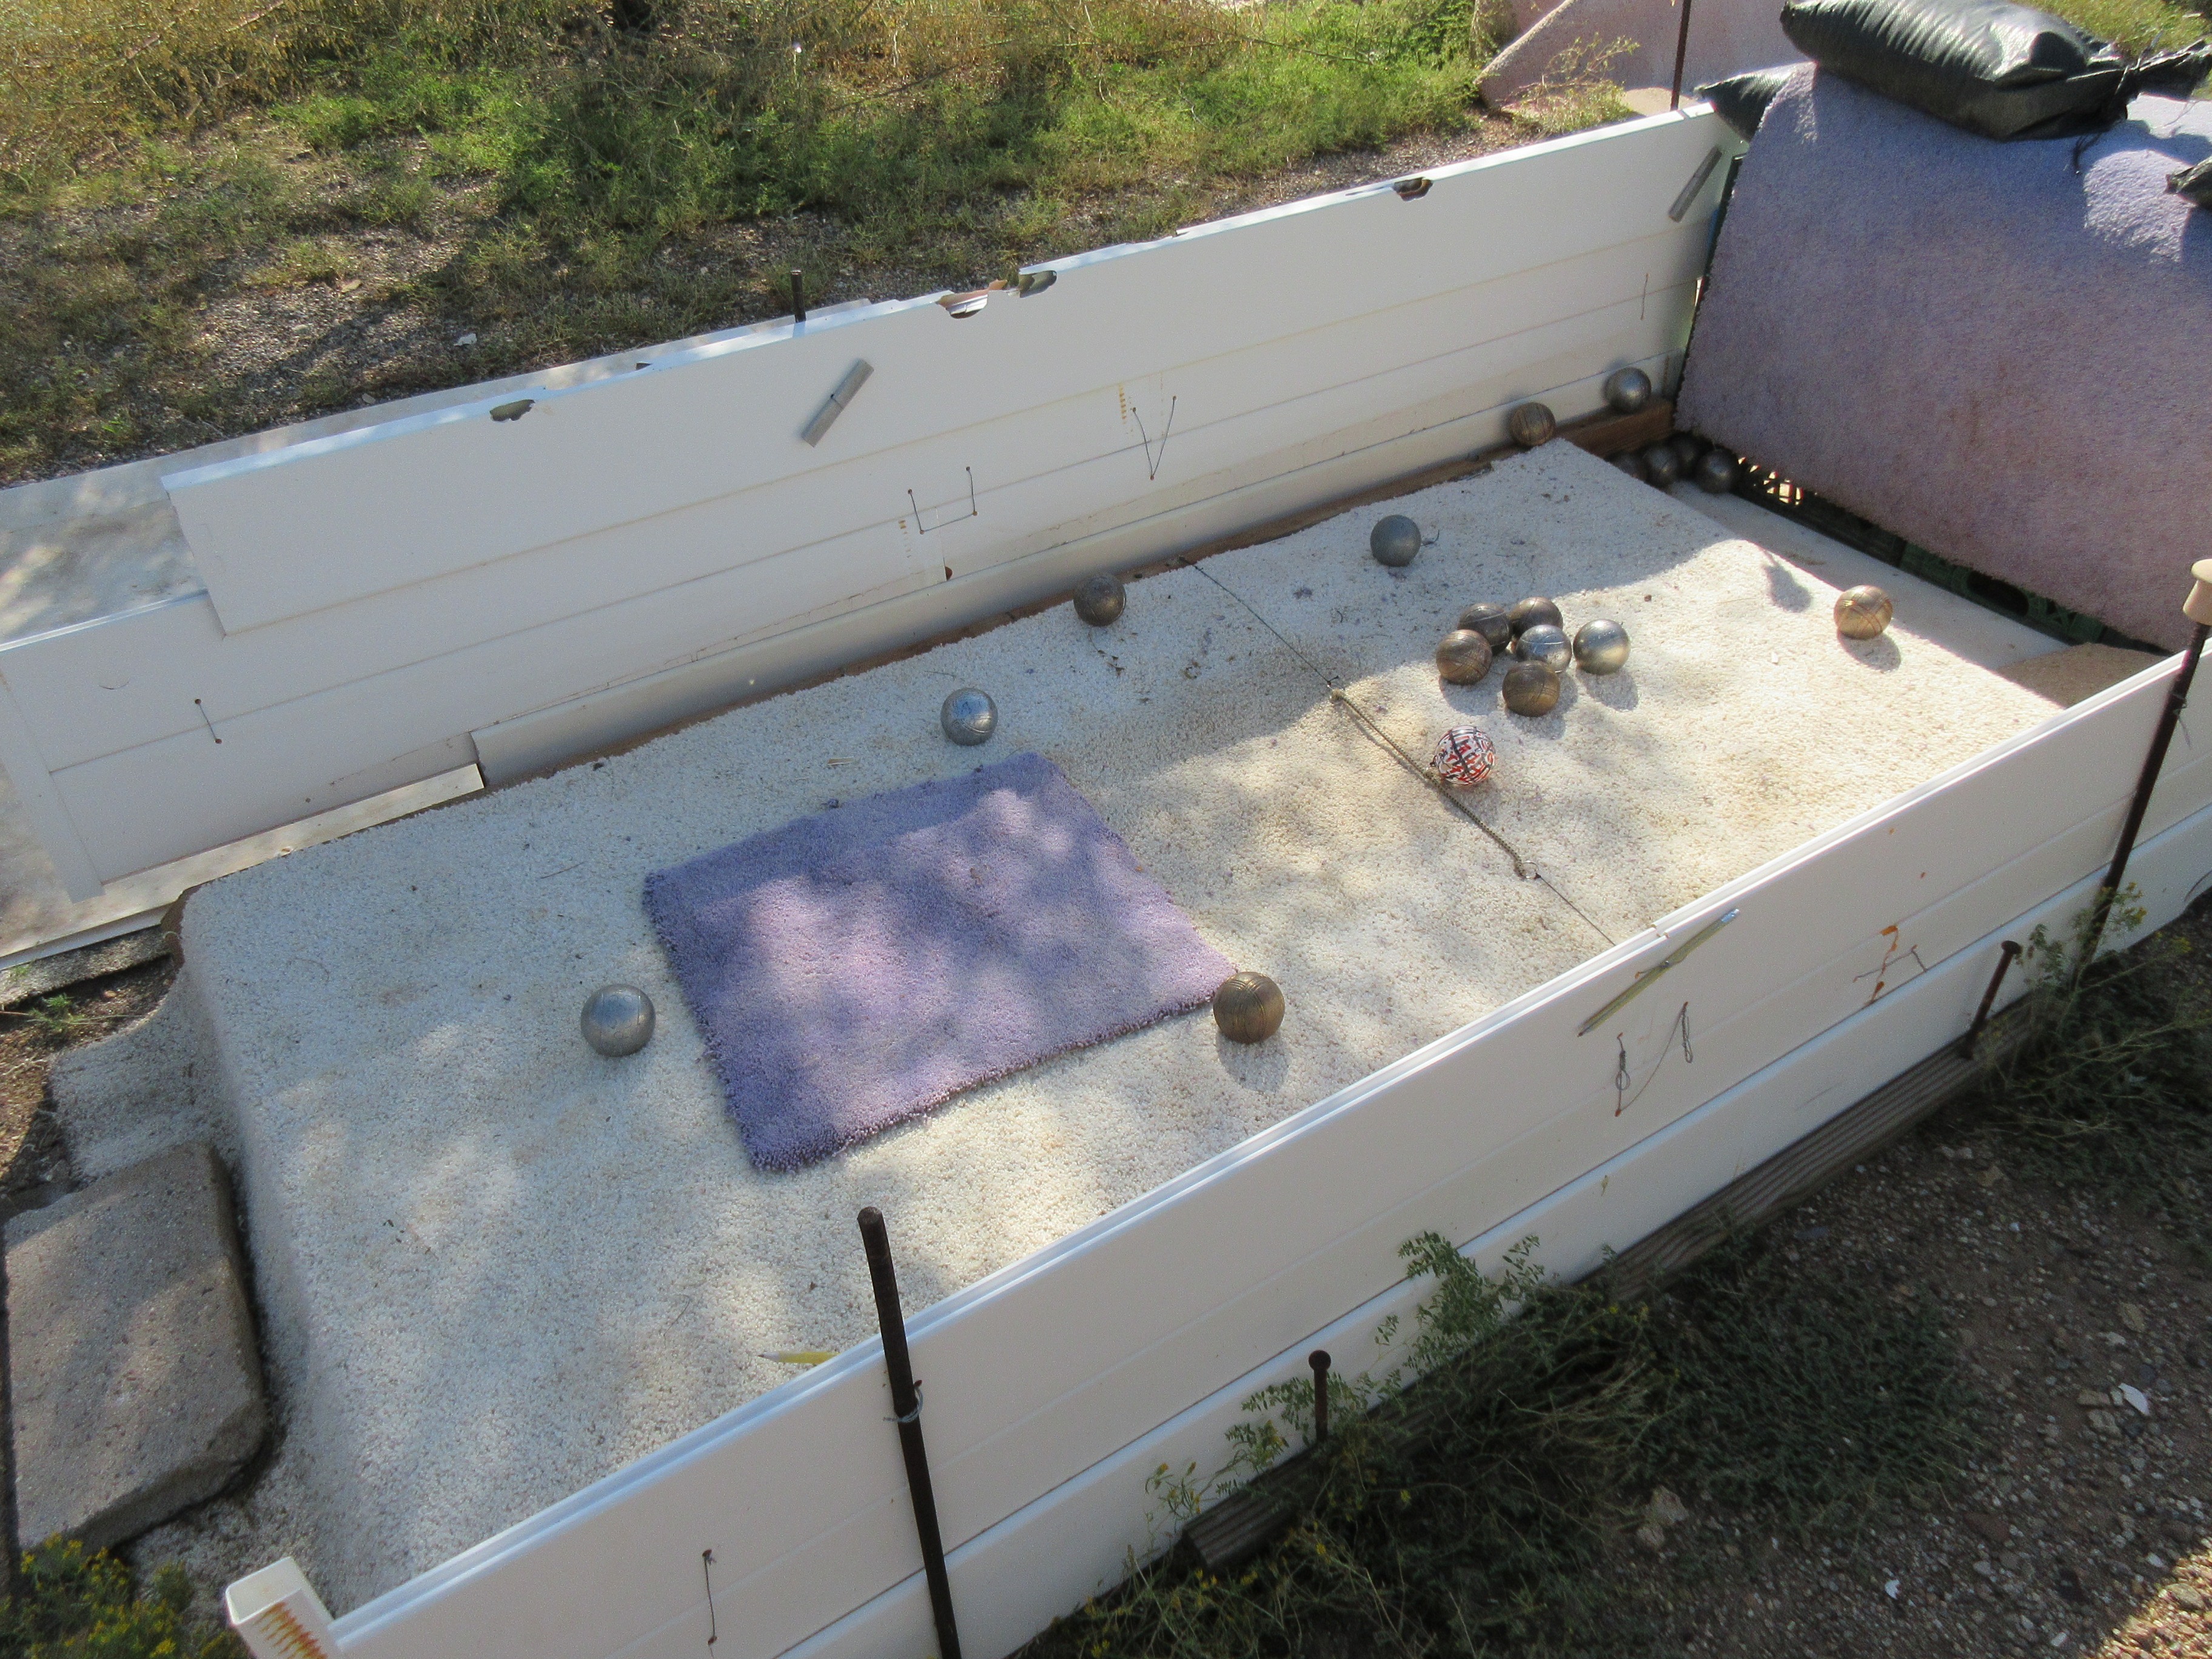
Practicing lobbing
I use the pit to practice lobbing as well as shooting. I take a colored carpet scrap and place it two feet in front of the wiffle ball. My goal is to throw my boule high, so that it lands on this “lobbing pad” and then rolls close to the wiffle ball. In this picture I managed to get 6 (out of 21) boules reasonably close to (but behind) the target.
The sandbox in action
I created a short Youtube video to show the sandbox in action. You can watch it and judge for yourself the overall design and the bounce suppression of the sandbox.
Some closing thoughts
Because of the bounce-suppression capabilities of sand, the sideboards of this shooting pit don’t need to be very high. My sideboards are about 16 inches (40cm) higher than the surface of the sand, or about 22 inches (55cm) higher than the ground.
On one side of the sandbox, I left a gap of about an inch (3cm) between the side of the sandbox frame and the sideboards. When it rains, the rainwater runs off of the rain cover and into this gutter.
Note that the carpet is wide enough to cover the sand but not wide enough to cover the boards that form the long sides of the sandbox frame. Those boards are left exposed because they hold the screws that hold the ends of the elastic cord that holds the wiffle target ball in place.
Note that the carpet that covers the sand is not nailed to the sandbox frame. You want to be able easily to remove the carpet so you can get at the sand. either so you can smooth and level the sand, or so you can dry out the carpet and the sand after an unexpected downpour. Because the carpet isn’t nailed down, each boule that you throw will push the carpet a fraction of an inch, and over time the carpet will slowly creep backwards toward the boule-collection area. Every now and then I simply tug the carpet back into place.
Unlike shooting pits made with harder materials, this shooting-pit is quiet. You can practice in your back yard without disturbing your neighbors.
Stores that sell and install carpeting also discard large scraps of used carpet. Usually you can find a carpet store near you that will be happy to let you raid their dumpster for scrap carpet. If a carpet store is closed when I arrive, and there’s nobody to ask, I’ve been known to raid a dumpster without asking permission. In my experience, carpet stores really don’t care at all about how their dumpster gets emptied.
When I experiment with shooting pit designs, I use cheap, scrap, and recycled materials— whatever I can readily lay my hands on. My experiments are designed to test functionality, not to look pretty. That means that you can easily build a shooting pit for yourself that is much more elegant than this one.
I’m sure that further improvements to this design are possible. So my purpose in this post isn’t really to document an ideal, ultimate design. Rather, I hope I’ve provided a few ideas that you may find useful when you construct your own shooting pit.
If you are interested in my earlier experiments in shooting-pit design, see THIS.
FOOTNOTES
The white plastic sheets that I put under the sandbox and use as rain covers are an acrylic material called Plas-Tek. They are used to line showers and may be available at your building-materials store. They come in 4’x8′ sheets, about 1/8″ thick, and cost about $30 each.
When a new player joins our group, we’re happy to lend him/her a set of guest boules to use while trying out and learning the game. Some new players turn into regular players. When that happens, they usually decide to buy their own set of boules, and they ask for advice about buying boules. Here is my attempt at short, simple, practical advice for players who are ready to buy their first set of petanque boules.
Note that this is my advice— someone else’s may be different. Much of this information is condensed or summarized from other posts, including our basic Buying Boules and Buying Competition Boules pages.
I always recommend that a player’s first set of boules should be a set of leisure boules from Petanque America. For one thing, Petanque America sells only proper sets of three boules (unlike sets of “bocce/petanque” boules for sale elsewhere). For another, leisure boules are reasonably priced. Don’t spend a lot of money on a set of competition boules until you’ve played long enough to be sure that that is what you want.
There’s another reason to start with inexpensive boules. You may develop ambitions to learn how to shoot. Learning to shoot requires a lot of practice. The best way to practice is to buy several sets of similar boules, so that you can throw a lot of boules in succession before having to retrieve the thrown boules and re-load your boule bucket. (I practice with seven sets— 21 boules.) If you’re buying several sets, you need to keep your cost-per-set within affordable limits.
COMPETITION BOULES
After playing regularly for a year or two with leisure boules, some players decide to buy their first set of competition boules. This means that they have choices to make about size, weight, material, hardness, and grooves. There is a huge amount of traditional advice on these subjects. Some of it is good for some players (advanced) but not for others (beginning/mid-level). Some of it is contradictory. Some of it is pure folklore. Most of it is rubbish. Ignore it.
For size, I recommend one size, 73mm, for almost everyone. For almost everyone, this size is just right — neither too big nor too small — and easy to get comfortable with. And if you’ve been practicing shooting (see above), this is the same size as the leisure boules that you’ve been practicing with.
There is one exception to my standard recommendation. Many of our women players are petite. With smaller hands, they struggle to grip a 73mm boule. For them (or for anyone who finds 73mm to be too big), I recommend a size of 71mm, or (if they can get it) the smallest size available, 70.5mm. For many petite women, playing with a 70.5mm boule rather than 73mm can make a real difference.
For weight, I recommend 680 grams. Everybody finds that this is a comfortable weight, and you don’t really need anything heavier.
For material, I recommend carbon steel (acier) rather than stainless steel (inox). It tends to be less expensive than stainless steel. Unlike stainless, you can pick it up with a magnetic boule-lifter. If you deliberately want to rust your carbon steel boules to give them a slightly rougher surface, you can. The one advantage of stainless steel is that it resists rust. Rust usually isn’t a serious issue for carbon steel boules, but if you live in a hot, wet climate and other players tell you that they use stainless boules because they’ve found that rust is an issue, follow their example.
For hardness, I recommend a “hard” rather than a “soft” boule. If this is your first set of competition boules (and especially if you frequently play on rough terrain), you probably need high scratch resistance more than low bounciness. And when you shoot and nick a target boule, you want it to go flying as far as possible.
For grooves, I recommend a boule with at least a few grooves, rather than no grooves at all. A bit of paint or magic marker in the grooves will last a reasonable amount of time and will help to identify your boules. High-profile shooters play with smooth boules (and you can too, when you get to be a high-profile shooter) but for your first set of competition boules, go with the grooves.
First-time buyers often ask for specific recommendations about what competition boules to buy and where to buy them. As of September 2021, for players located in the USA, I recommend—
Obut boules are more expensive than Geologic or La Franc boules, but Obut has about an 80% share of the world-wide market for competition boules and is without doubt the most widely-recognized brand of boules in the world.
Recently I stumbled across a Youtube video that really spoke to me. It is only 15 seconds long. What it said to me was— Watch!! THIS is how to do it.
Marco Foyot shows the same thing in this coaching session; his first boule (at around the 15 second mark) is a beauty.
When lobbing, do NOT come up off your heels and onto your toes like the student is unconsciously doing at the beginning of the video. He thinks he’s imitating Marco’s form, but he’s not. (This is where a coach can help.) Marco’s feet stay flat and firmly planted on the ground at all times; his heels never leave the ground. Your feet are your base; you want a solid foundation for your throw. You throw with your arm, not with your toes.
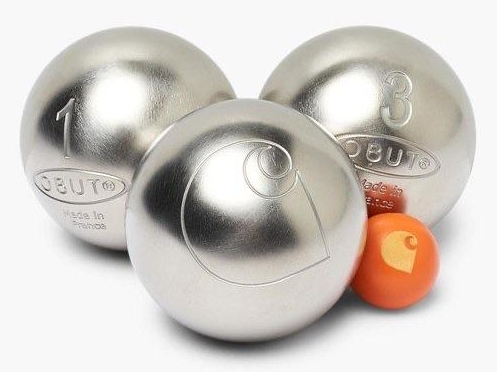
While surfing the Web I stumbled across something called OBUT X CARHARTT WIP PETANQUE BOULE SET and thought I’d investigate.
It turns out there isn’t a lot to say. The name “OBUT X CARHARTT WIP” means simply that Obut agreed to manufacture a line of boules for Carhartt WIP. Around March 2020, Obut agreed to take a batch of their regular stainless-steel leisure boules, stamp a Carhartt logo on them, and try to sell them for more than twice their normal price. They don’t seem to be available in the USA, but you can find them on various European shopping sites for €116-€139.
I don’t see a bright future for them. They definitely fall in the category of What were they thinking??!!
La Franc boules are made in Thailand. They are high-quality competition boules, reasonably priced, with a good selection of weights, sizes, and groove patterns. I especially like the glossy matte finish on the carbon-steel boules. It looks great and it feels good in the hand.
In the past… for many years… a set of La Franc boules from Petanque America was the standard choice for a first set of competition boules. It was also the first choice for players who understood that you don’t actually play better with an expensive set of boules! But there started to be shipping problems, supplies became unreliable, and in 2016 Philippe reluctantly decided to stop selling La Franc boules.
That was four years ago. Since then, things have changed. There are now a lot of new converts to the game in the US. There is a healthy demand for affordable competition boules with a good selection of weights, sizes, and groove patterns The dollar/euro exchange rate has shifted to favor La Franc. So Philippe decided to reconnect with La Franc, and La Franc responded quickly and efficiently. The bottom line is that Petanque America is again selling La Franc boules, and the future is looking bright for La Franc boules in the USA.
Here is a set that I just ordered. As you can see, the old cardboard-box packaging is gone. We now have a sturdy plastic carrier, similar to the way that Geologic boules are packaged. These carriers are pretty useless, of course. You really need a sturdy bag that can hold your boule towel, measuring tape, spare jacks, etc. Still, it looks nice.
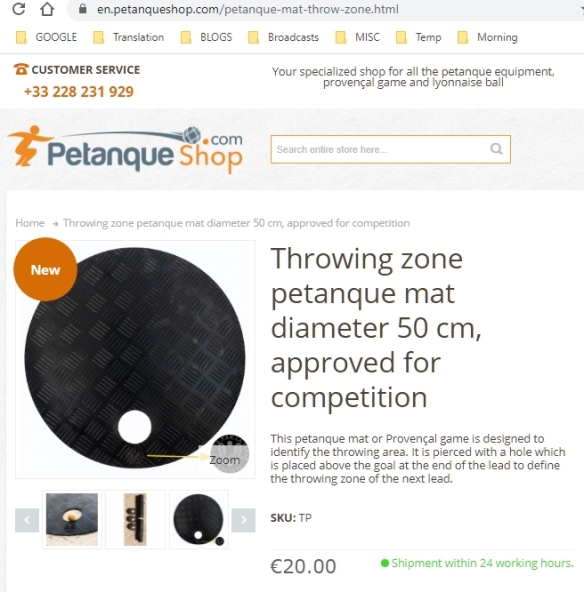
There is a new product on the market— the “petanque mat” (tapis de pétanque or tapis de lancement). It is a 50cm circular piece of vinyl polymer (rubber). It is 3mm thick. You place it on the ground like a plastic circle, and when you throw, you stand ON it rather than IN it.
It is manufactured by a Franch company, Tapis de Pétanque (tapisdepetanque.com/). Their web site says that these petanque mats were approved by the FIPJP in 2019, and they put a stamp on the mats to prove it. (I haven’t found anything on the FIPJP website that documents or announces this approval… but then the FIPJP said nothing a few years ago when it approved OBUT’s paramagnetic “black jack”.)
The mat comes in a plain black “classic” design (above) for about €20 and a slightly thicker (4mm) “luxe” version. The luxe version comes in a variety of preprinted designs for about €70, and you can have one printed with a custom design for around €140.
The touted benefits of the mat are that it can be rolled up, making it more portable than a plastic circle; it is comfortable to stand on; you can’t trip on the edge when stepping off of it; a player standing on it cannot move it; and it causes no disturbance of the ground that needs to be repaired at the end of the mène. I think we have to take those claims with a few grains of salt. It’s still possible, of course, to trip on the edge when stepping ON to the mat. And it is possible to kick and move the mat when you aren’t actually standing on it, so you still must mark it.
I think it is a neat idea, but for manufactures and vendors of petanque equipment, not for players. Basically, it is just another platform for advertising. In the future we may start to see mats with OBUT logos in televised championships, but for everyday grass-roots games nobody is going to spend €140, or €70, or even €20 on a mat when they can get a perfectly serviceable plastic circle from Decathlon for $7.
One consequence of these mats— assuming that the FIPJP now really does recognize/approve the use of mats as well as plastic circles — might be that grassroots players will begin cutting 50cm circles out of pieces of carpet tile, scrap rubber or carpet, to make their own home-made mats. Personally, the idea of lugging around a dirty old piece of carpet doesn’t appeal to me— I’d rather just draw a circle on the ground, in the traditional way. Or I could raid my grand-daughter’s college savings fund and purchase one of these tapis de pétanque— after all, they are washable.
Last week I tried to watch a petanque video on Youtube, but it was hopeless. You just couldn’t see the jack. It was a low-resolution video, the terrain was light-colored, and the black-colored jack was completely lost among shadows caused by irregularities in the terrain. Eventually I gave up.
Later I wondered what could have been done to make the jack more visible. Perhaps a different color. Or… perhaps… a larger jack!
There is no reason why the jack has to be the size that it is— 30mm ±1mm, as currently specified by the FIPJP rules. The size isn’t written in stone. Before 2008, the official size of the jack was 25mm to 35mm in diameter, which allowed for quite a lot of variability.
What if we played with a larger jack? For one thing, it would make televised matches easier to follow. And there would be another benefit— it would make the game easier for vision-impaired players. Last year one of our senior players began to experience the effects of age-related macular degeneration. Fortunately she was able to continue to play if we used our brightest-colored jack. But it occurs to me that we could help her even more by playing with a larger jack. Why not?
If you make your own jacks, it is easy to make a larger jack. Normally you would start with a wooden ball 1-1/4″ (30mm) in diameter. Instead, start with a wooden ball 1-3/4″ in diameter. The 1-3/4″ wooden balls that I ordered from amazon.com arrived in a package marked 1.7in | 44mm. The size seems good to me: bigger, but not too big. Here is a picture of the two sizes of wooden balls along with a 75mm boule.
I’m not saying that the FIPJP should change its rules about the size of the jack. (Although it would be sensible to provide competition organizers with a “large jack” option for televised games or games with a large stadium audience.) But I think that for friendly games with vision-impaired players, it would be quite reasonable to consider making and using larger jacks.
Almost from the day that petanque was invented in 1910, petanque players have experimented with tools and methods for drawing a throwing circle on the ground. Using a foot to swipe a curve (courbe) in the dirt was crude. Drawing a cicle with a finger left you with dirty hands. Using a stick worked well, but suitable sticks weren’t always readily available. Players began to experiment with specialized tools for drawing circles, and in the process they created one of the lesser-known pétanque traditions— that of l’outil pour faire le cercle or simply la circulaire.
The most popular type of circulaire was made from the tip of the horn of the Alpine Ibex. Some were simply polished, but there was also a tradition of elaborately carving the horns. Possibly because many of the carved circulaires were created by sailors (who played petanque while in port and carved scrimshaw while at sea), one of the most popular designs was of a mermaid holding up two boules. In 1971, the founders of Starbucks Coffee adapted that design to create the first version of their company logo. The design was altered so that the mermaid’s tails cover the boules in her hands, but you can still see the boules in the band surrounding the image.
Carved circulaires were never widely used, partly because only a few of them were ever created, partly because they were expensive, and partly because the Alpine Ibex had been hunted almost to extinction. Some players improvised circulaires from old screwdrivers and, more recently, old ballpoint pens. Some players opted for a manufactured “petanque marker”, a version of which is still available from PetanqueShop.com.
Although these designs were functional and effective, I’ve always felt that they were a bit clunky. Recently I found a new, streamlined design that I actually prefer. It is long enough to provide a good grip and good freedom of motion for the wrist. There is a nice rubber cushion on the handle. A graphite core keeps the weight down, and its slim design allows it eaily to be tucked away in a pocket. It is available for €16 at PetanquePoisson.com.
[Additional text added 2021-01-04]
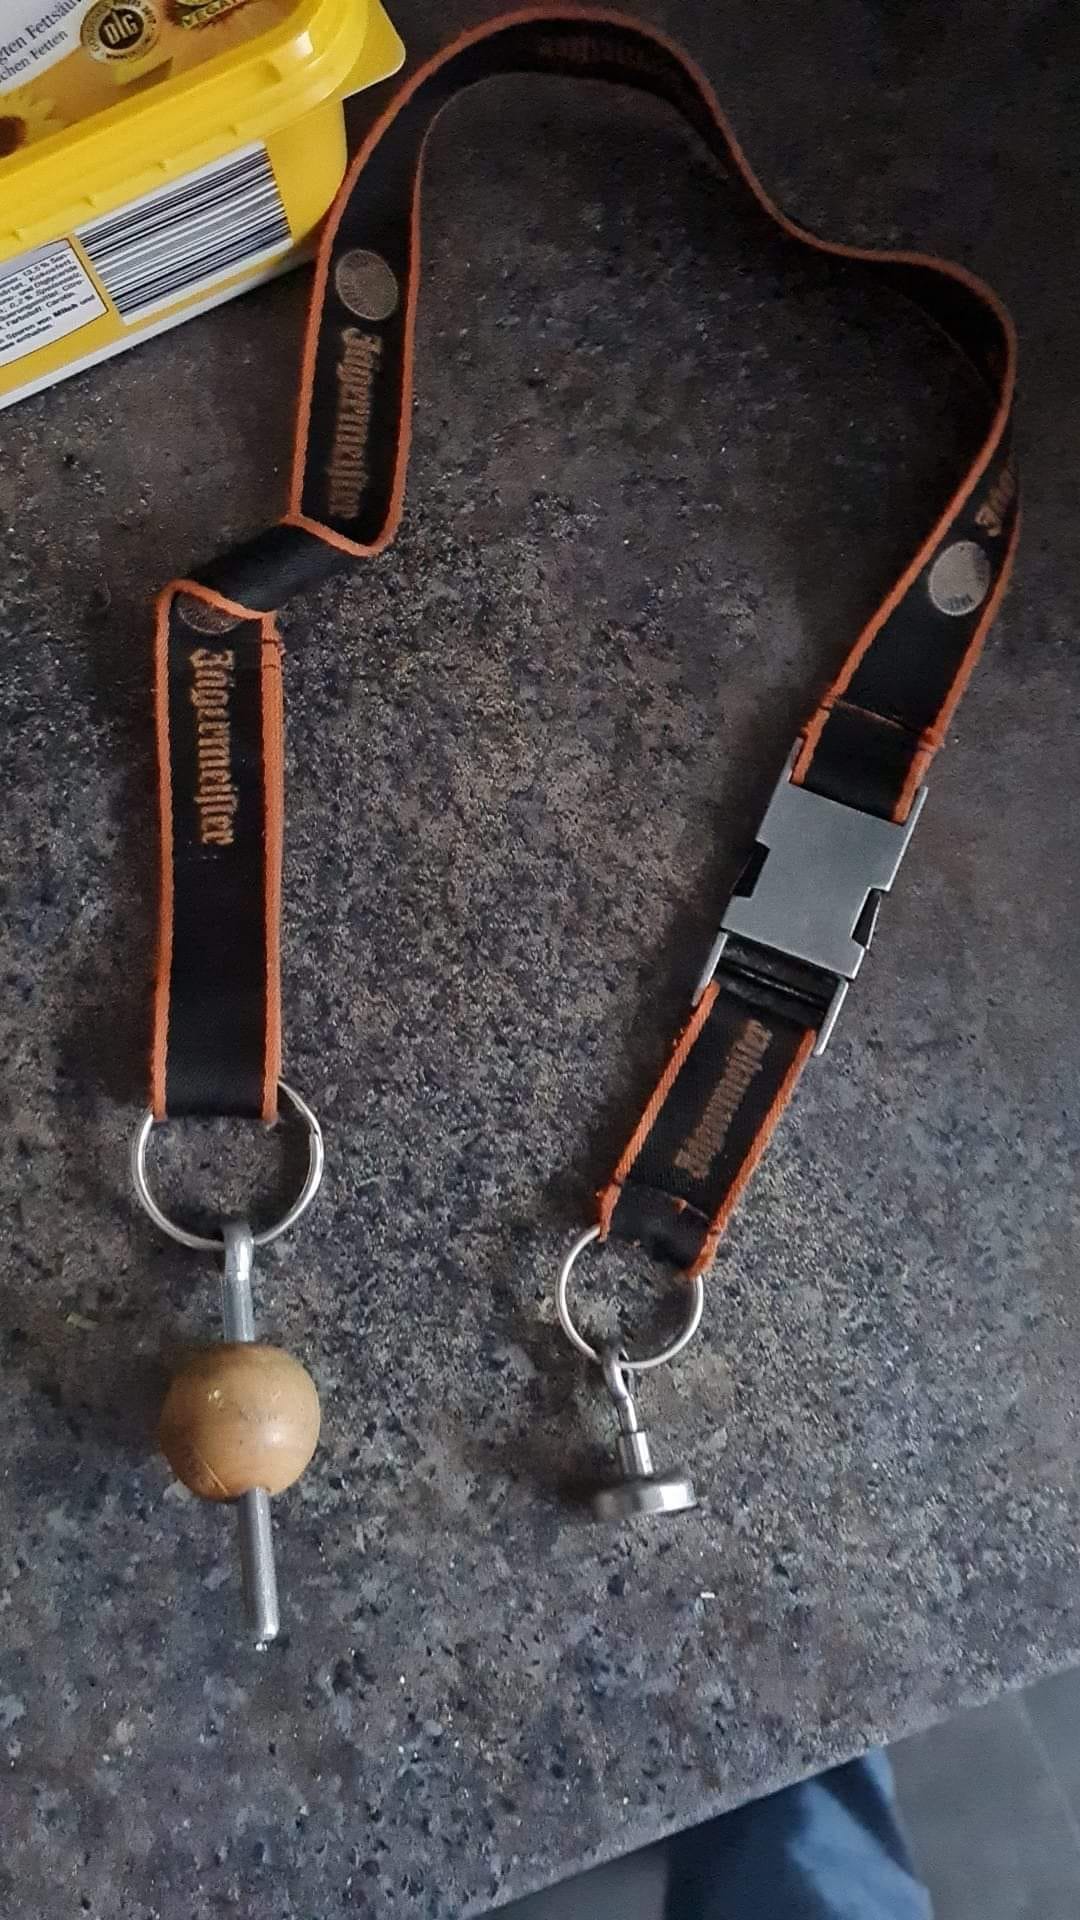
This post is, of course, an April Fool joke. It is true, however, that petanque players have been known to make tools specialized for marking the circle. Here are a couple that I found on a German Facebook group. This one adds a circle-marker to the handle end of a strap for a magnetic boule lifter.
This one puts a circle-marker on a retractable key holder.
Online translators can be tremendously useful for those of us who are not bilingual (or at least not fluently). This year I wanted to translate a simple sentence from English into French. I ran it through four different free online translation sites. Here is how those sites compare.
English: “Father Christmas says that Christmas may be late this year.”
Desired French: “Le Père Noël dit que Noël pourrait être en retard cette année.”
Google can translate only short passages. Its translation had one capitalization error. The SWITCH LANGUAGES feature is primitive. User interface is not user-friendly.
The user interface is good. A major CON is that the translation had the most errors (3) of any of the sites. On the other hand, it was the only site where you could hear the translated text in good native-speaker French. It can translate up to 5000 characters.
SYSTRANhttps://translate.systran.net/translationTools/text Click to open a larger image.The user interface is good. It is possible to hear the translation, but the spoken French is terrible – it was what you’d hear from an American who doesn’t know any French and is phonetically sounding out the written text. It can translate up to 5000 characters.
Systran seems to be the most full-featured of all of the sites. It provides a lot of vocabulary tips and offers alternate translations based on different “models”. Click to open a larger image.
DeepL has a good user interface and produced the best translation of any of the sites. The real strength of DeepL is that you can upload a long document in .docx format and DeepL will translate it for you. This is the only site that offers that feature.
THE BOTTOM LINE
DeepL is our winner. It produced the best translation (zero errors), has a simple and friendly user interface, and can translate uploaded documents.
Systran is a strong runner-up. It did a good job at translation and offers a lot of useful extras.
Our obvious losers are Google and Bing (Microsoft). Google Translate has an extremely crude user interface that is actually unpleasant to use. Bing‘s translation was the worst of all of the sites, with 3 outright errors. However, it gets an honorable mention for its good user interface and its ability to produce good spoken French.
 Many of the sets of two boules that you see on eBay and Etsy are old, some of them dating as far back as the 1930s. But Obut continued selling two-boule sets right up to 2012, so some of the sets may actually be quite new. The DOG leisure boules that Obut sold after World War II, for instance, were sold in pairs.


 For those players, for the last decade the only decent English-language book on petanque has been Byron Putman’s 2011 book
 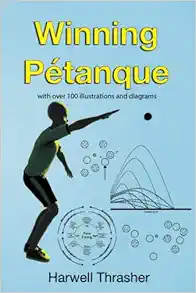 But now (as of April 20, 2022) we have something that more precisely meets the needs of new players. It is


 In English we’d say that the boule is kissing the jack. What would a French petanque player say?

 Note that manufacturers often sell both competition boules and leisure boules, so the name of a reputable French manufacturer does not mean that the boules are competition boules. If the packaging does not display the FIPJP logo and the “certified” label, the boules are not competition boules. These classic JB boules look great… but they are not competition boules.


 … or the no less remarkable Pascal Milei—
 Still, you don’t need to be that extreme. For most players, getting your throwing arm back until it is horizontal is enough to do the job.
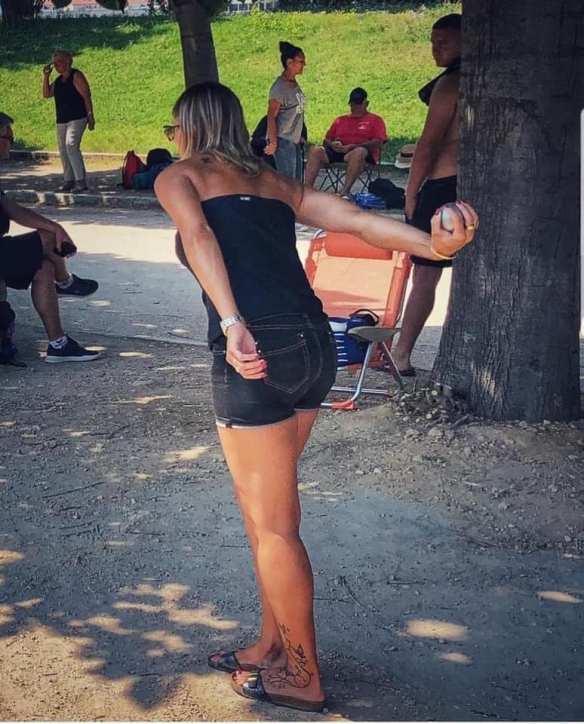

 You don’t always want to shoot or lob, so you don’t always need a big backswing. But sometimes you do want to shoot or lob, and that’s when you must have a big backswing in your tool bag.
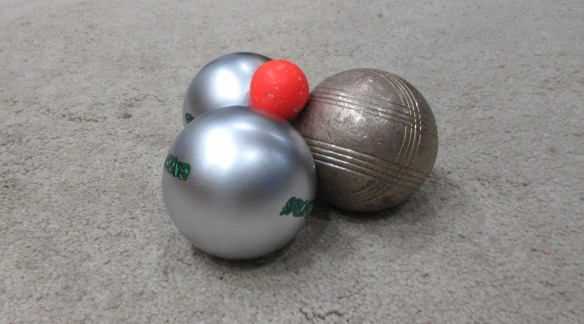


 It is manufactured by a Franch company, Tapis de Pétanque (